LEDspots
To start with
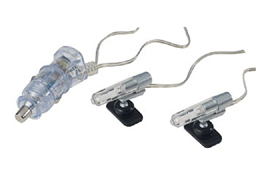
Ever wanted small spotlights in your car like these:


But what if you didn't like the ones available on the market, or if you simply think they
were too expensive? Well then, grab your tools, see that you get the stuff needed for this, and read on!
First off, we start with the ingredients for this lovely piece of bakery.
For one spot, you need:
- a length of aluminium tube, 8mm diameter, 1mm thickness
- a length of aluminium strip, 10x2mm
- a length of M3 thread
- two capped nuts, M3 threaded
- two nylon bushings, M3
- a screw, M4x30, with a domed head
- two metal bushings, M4
- one metal bushing, M4, but larger diameter
- a self retaining nut, M4
- a LED, color of choice, 5mm diameter
- a resistor, matching the LED. You can use this site to calculate it, if you understand dutch... Use 15 volts to calculate, you'll be save then
- loctite might be usefull
- hotglue or silicon glue
- shrinkage tube, to cover the feet of the LED and the resistor
- soldering lead
- some thin wiring. Look for the wires with two separate cores (one for +12V, one for ground)
If you want to make more than one, you only have to buy additional capped nuts, bushings, self retaining nuts, LEDs and resistors. You should be set and done for under 15 Euros for one, the additional parts for more spots should be well under 1 euro. Hell, I made 8 of these for only 16 euros, so you could do that too!
Okay, so now we know what kind of cake we are going to make. But to make it, we need tools:
- a iron saw. If possible, get both a small and a large one, if not possible, only the big one will suffice
- an electric drill, preferably a column version for straighter drilling
- of course, drills, preferably one of 1.5mm, one of 3.2mm (3.5 will also do fine) and one of 4.5mm
- a vile, take a fine one please
- a pair of pliers, to bend the aluminium strip. Make sure that the pliers are not wider than about 8mm, but also not too much smaller!
- a soldering iron
- something to apply the glue of your choice with
- a water resistant pen, with a small tip
- a mitre box might come in handy, but isn't strictly spoken necessary
- a centerpoint or big nail and a hammer can be very useful to prevent misdrilled holes
TIP: if you are making more than one, try to make them altogether, instead of one by one. This way, you save time grabbing different tools, and fooling around changing drills.
So, Enough lists, let's start working.
back to index--proceed to next page